To properly display this page you need a browser with JavaScript support.
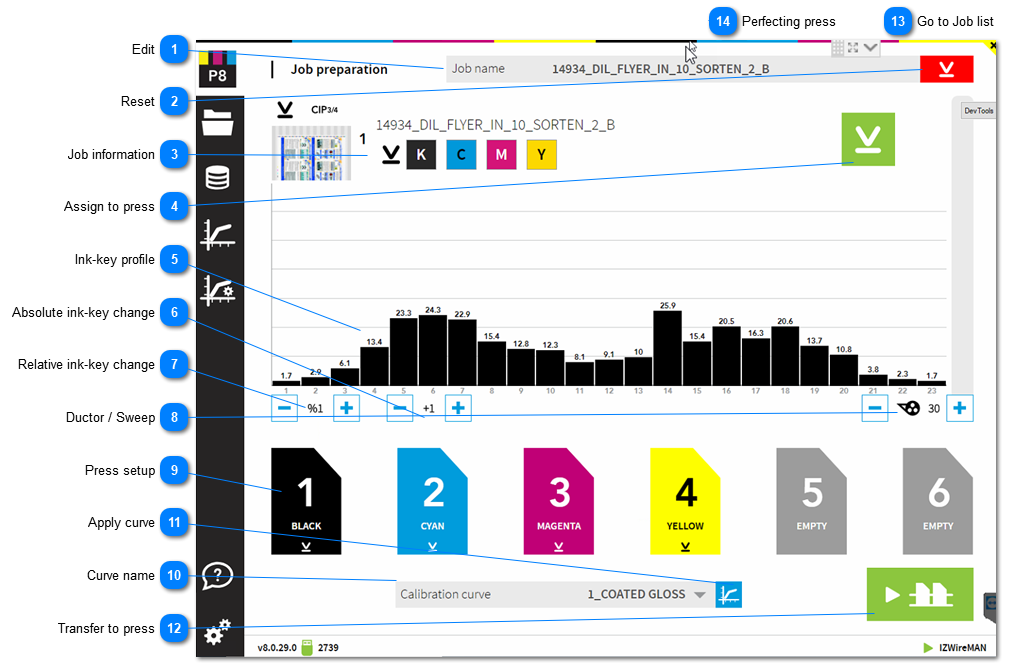
Edit Job name. Can be modified here.
Reset Clear the current color to press unit assignment
Job information Job information. Drag and drop from here a color to the press unit. C M Y K colors are automatically assigned to the unit defined in the press setup. A spot color is typically assigned by selecting drag and drop.
Assign to press Assigns C M Y K, the process colors, to the press units. The standard color to unit assignment from the InkZone press setup is used.
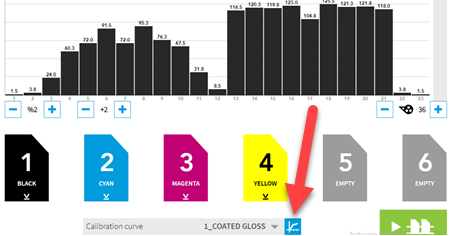
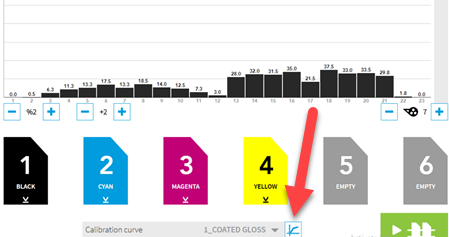
Ink-key profile Preview of the ink-key profile and the raw plate coverage.
Absolute ink-key change Increase and decrease ink-key values absolute.
Relative ink-key change Increase and decrease ink-key position relative.
Ductor / Sweep Increase and decrease ductor / sweep in absolute mode
Press setup Selected ink assignment.
Curve name Active paper calibration curve, used for the ink-preset.
Apply curve By default, the button is in mode apply calilbration curve to ink-coverage . The ink-key profile shown above is the data to be transferred to press.
Toggle with the button between plate coverage and ink-key profile data.
Apply curve active: shows ink-key profile for press
Apply calibration curve not active: shows plate coverage
Transfer to press Transfer job to the press console.
Go to Job list
Perfecting press